Supported Commands
Overview
The Supported Commands area defines the types of commands users can send to devices of this model. A number of parameters can be defined for each supported command, including additional fields the user must fill in (e.g. setting volume requires the user to provide the volume they request).
Main view
The main view shows a list of all defined commands, their status and general parameters.
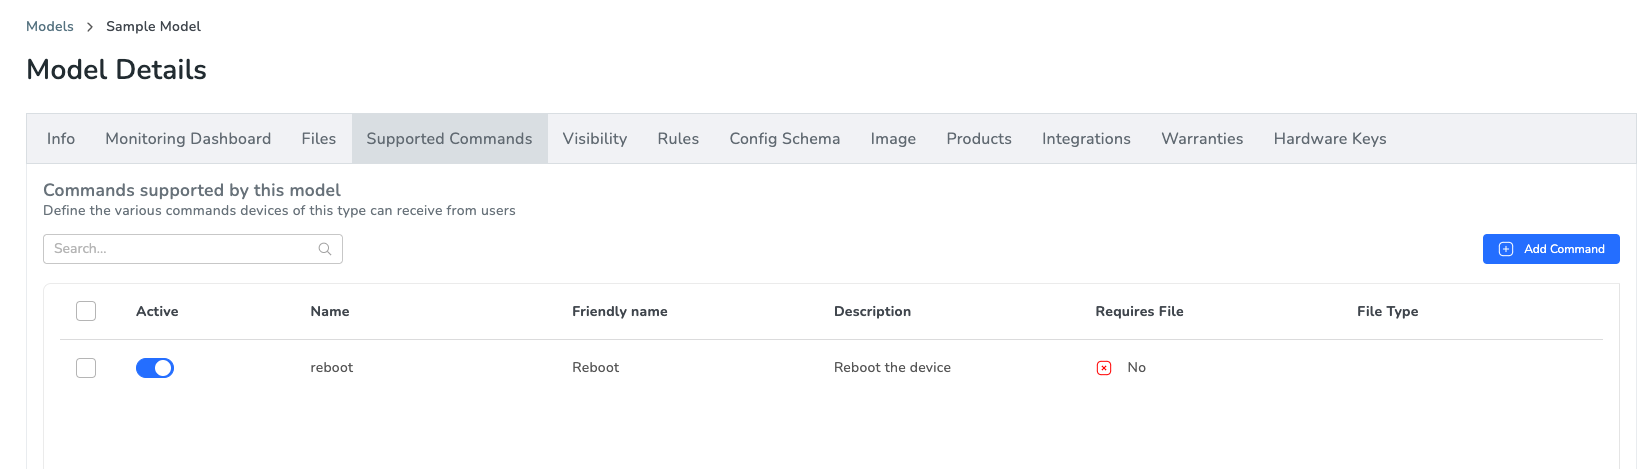
Active - Specify if the command is available to users or is hidden. Allowing adding commands and testing in Lab Accounts before making available to the general public.
Adding commands
A new command can be added via the "Add Command" button located on the top right.
Basic Fields
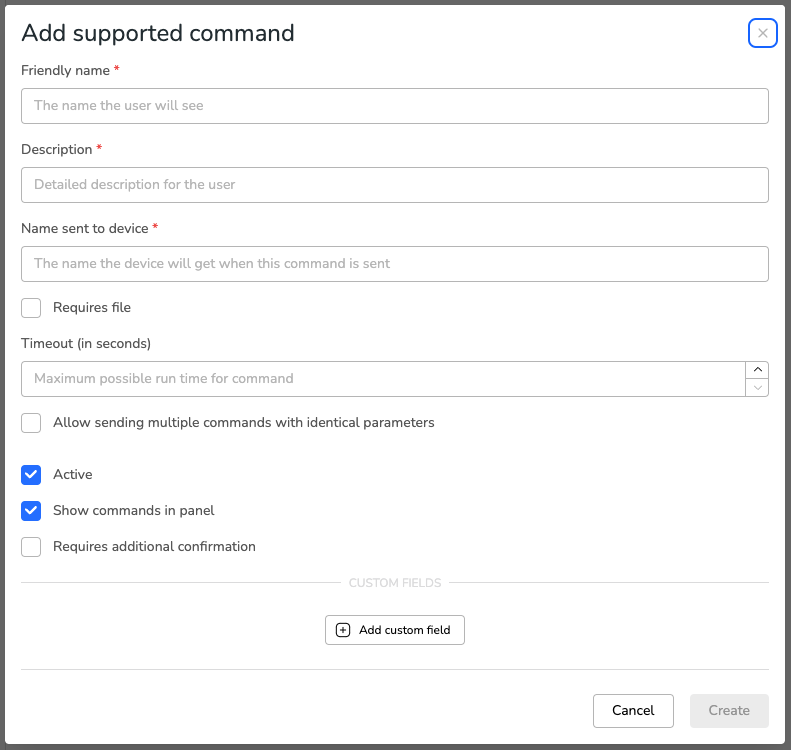
The following fields should be set for each command:
| Name | Description |
|---|---|
| Friendly name | The string displayed to the End-Users. |
| Description | A short description of the command displayed to the End-Users. |
| Name set to device | The string sent to the device as part of the GET COMMAND API |
| Requires file | When marked, this command will require a Partner provided or End User uploaded file. The file "family" must be specified to mark what kind of files the command expects. |
| Timeout | The maximum time for this command to execute and update the server on the status. After this period, the server will assume the command has failed. During this time the device may stop responding at all (e.g. firmware upgrade process) and the system will not mark the device as "offline". |
| Allow multiple commands | Specify if multiple similar commands can be queued or the users should be prevented from sending the same command more than once (before the previous one has been performed) |
| Active | Enabled status make this command available for use (disabled commands can still be tested in Lab Organization accounts. |
| Show commands in planel | Show the command on the left pane side of the device view or hide it (in case its used inside command widgets) |
| Requires additional confirmation | For destructive commands such as "Reboot", ask the user for additional confirmation before sending the command to a device. |
Ensure the “Active and visible to users” box is checked if you want the command to be live and actionable from the Customer Portal.
Custom Fields
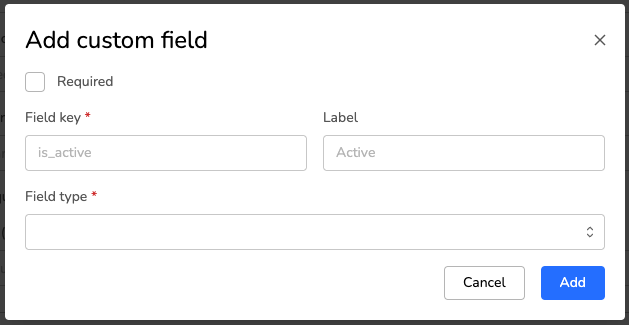
Additionally a list of "Custom Fields" can be sent to the device, as many fields as required can be added via the "Add custom field" button.
| Name | Description |
|---|---|
| Required | Will the End-User will be required to fill the key to send the command. If not a NULL value might be passed. |
| Field key | The string the device will receive as the key for this field. |
| Label | What label will be displayed to the End-User |
| Field type | Multiple field types are currently supported, such as: Number ranger, strings, JSON, multi and single select lists, etc. |
Supported field types
| Field type | Description |
|---|---|
| Static list (single-select) | Dropdown list with user selecting one option. |
| Static list (multi-select) | Dropdown list with user being able to select multiple options. |
| Dynamic list (single-select) | Dropdown list with user selecting one option from a dynamic list of options. |
| Dynamic list (single-select) | Dropdown list with user being able to select multiple options from a dynamic list of options. |
| String | Open text field. |
| Number | Number within Min/Max range. |
| Date | Date control |
| Boolean | Checkbox |
| JSON | Open JSON field. |
Dynamic lists
In some scenarios the list of options for the user to be passed to the command needs to be dynamic. For example the command to select an Input Source for a TV should include only the available/active ports like HDMI, USB and not all ports.
Three parts are required to make dynamic lists work:
- Location of options
- Path of options inside the location
- Array of options to display
Location of options
The options presented to the user can be either taken from the device's Details (static data rarely set by device) or Configuration (data modifiable both by the device and the user).
To specify the location, the path should start with either config. or details.
Path of options inside the location
Following the location, deeper nesting is allowed to be specified by the path. Each step is separated by a . or [] operator.
For example, the path config.key_name.sub_key_name will pull options from the Configuration, expecting to find a key inside named key_name and under it a sub key named sub_key_name
In case of arrays in the data, array elements can be referenced by using [index], e.g config.key_name[5]
Array of options to display
Once the path is resolved, the system expects to find an array of options to be displayed to the user at the target location.
Example
In the following example the device's Details are set to a complex object and dynamic parameters are used to allow the user to select an input from only enabled inputs.
{
  "video_settings": [
    {
      "color": "blue"
    },
    {
      "resolution": "1000x1000"
    },
    {
      "disabled_inputs": ["HDMI 2", "VGA"],
      "enabled_inputs": ["HDMI 1", "USB"]
    }
  ]
}details.video_settings[2].enabled_inputsHDMI1
USBHow the path finding worked
- In the Details of the device
- Find the key
video_settings - In the array inside take the 3rd (0 based index) item
- In the item find the key
enabled_inputs - Use the array at that location to generate the options for the user to choose from
Video demo
Updated 3 months ago