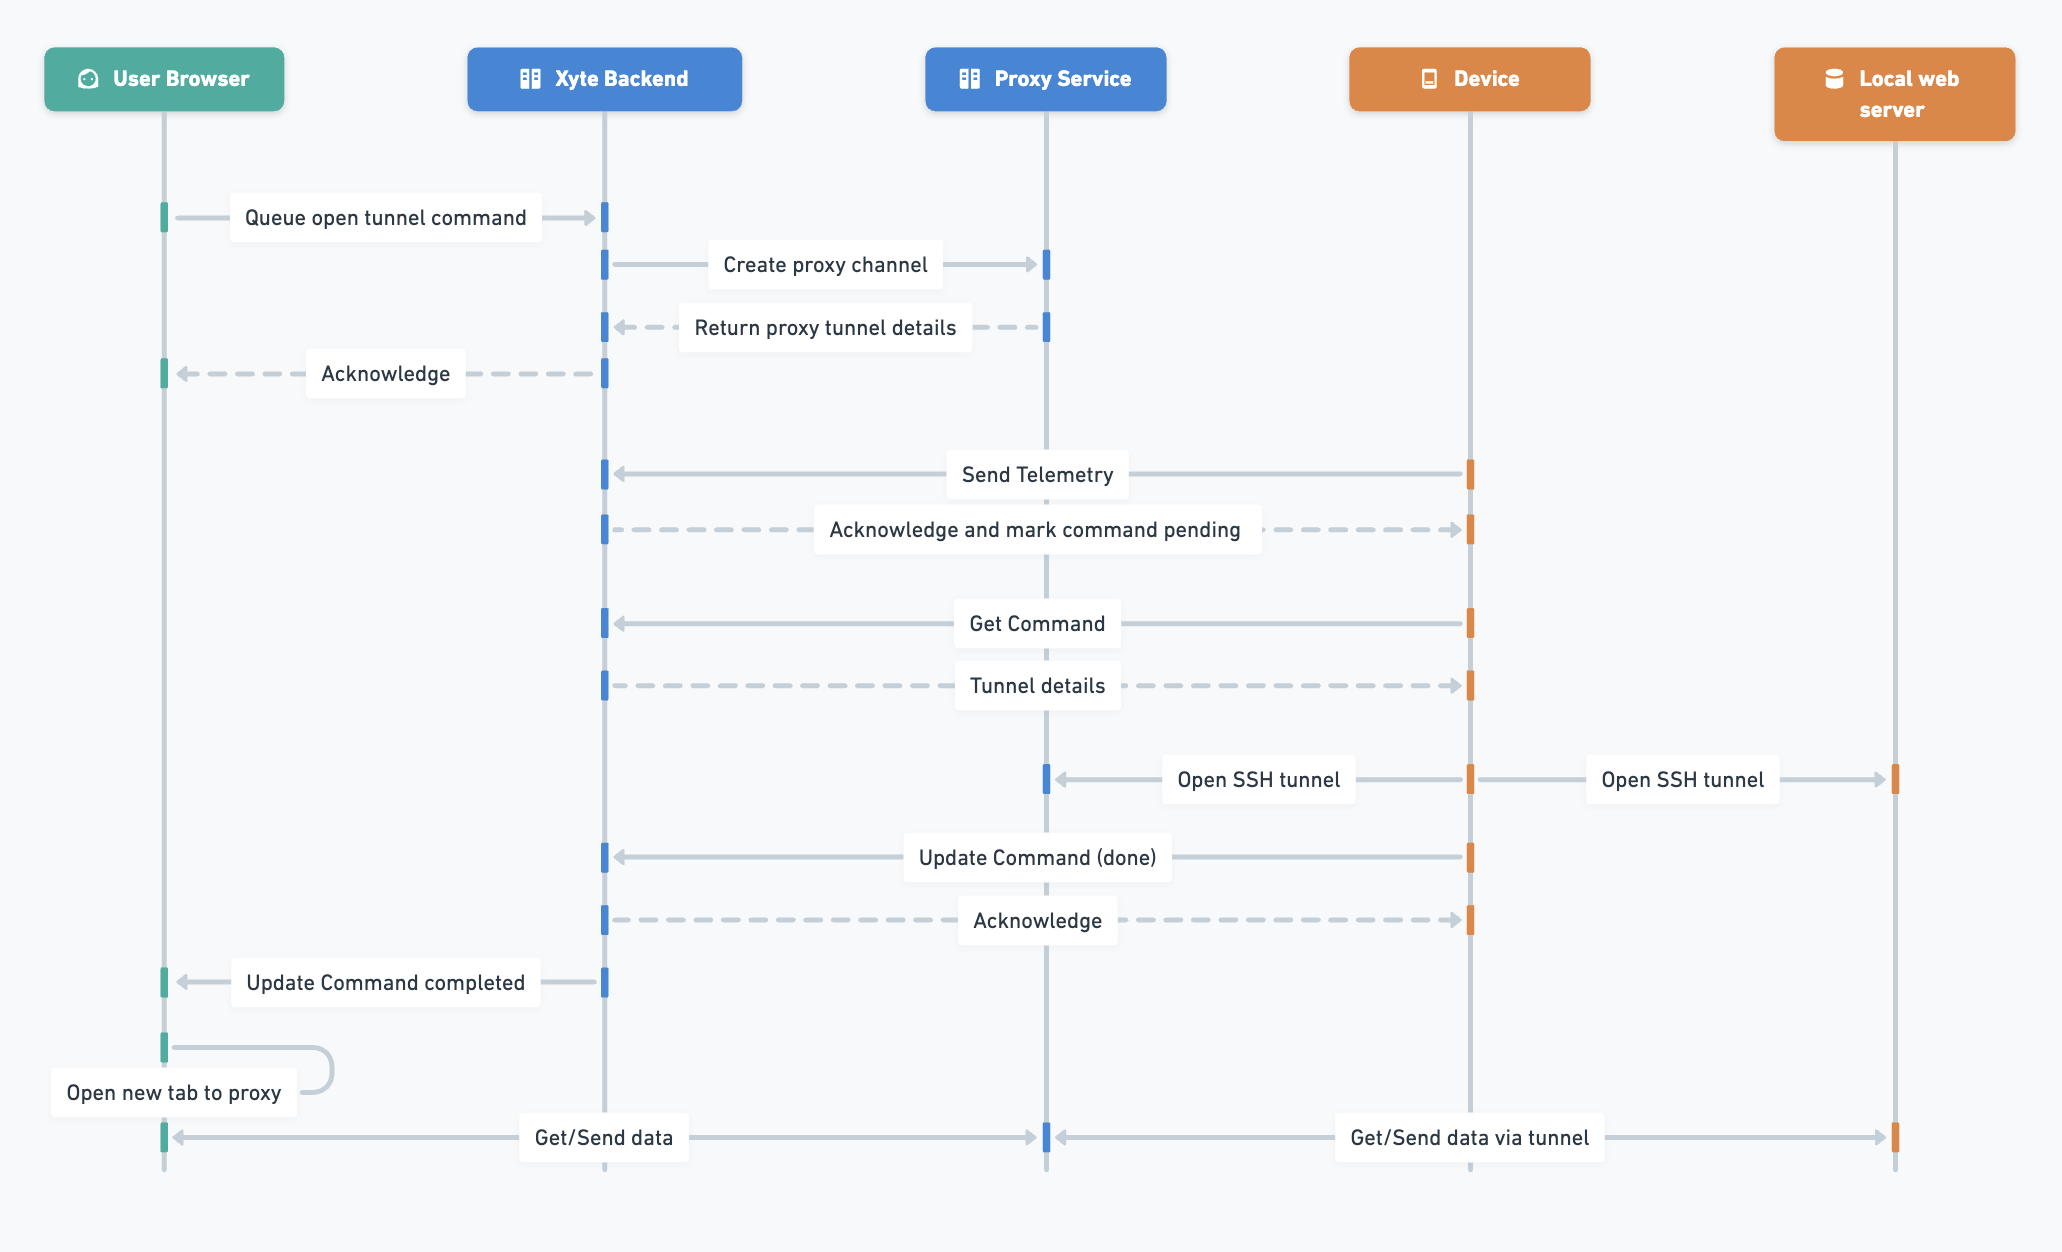
Many legacy products run an embedded web server on the Device that is only reachable from the local network. Device Tunneling lets a manufacturer expose that local web server securely through Xyte, so authorized remote operators can use it without waiting for every legacy feature to be re-implemented as cloud APIs.
The Device opens an outgoing reverse-SSH tunnel to a Xyte proxy server, and the platform issues a short-lived URL that authorized End Users can open in a browser to reach the Device's local web server. The SSH leg is end-to-end encrypted and authenticated using credentials issued per session.
Partner Portal setup
- Open the Partner Portal.
- Go to Product → Models.
- Select an existing Device Model or create a new one.
- Open the Supported Commands tab.
- Click Add Command.
- Check Open tunnel in the options.
- Choose
httporhttpsto match how the local web server is configured on the Device. The choice affects how the proxy renders the URL — the tunnel itself is always encrypted end to end.
- Choose
End Customer experience
-
Open the Customer Portal.
-
Find a Device of the Device Model configured above.
-
Click the tunneling Command on that Device.
-
The Customer Portal first shows a "connecting" notification:

-
Once the tunnel is established, the dialog updates:
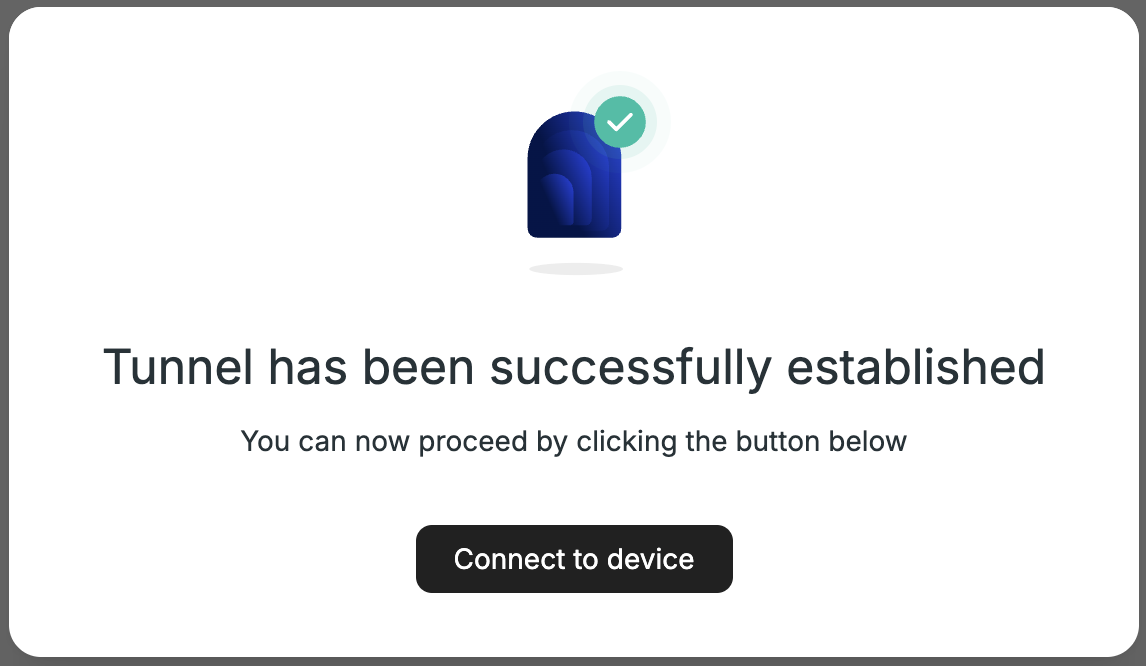
-
Clicking Connect to device opens a new tab routed through the proxy to the Device's local web server.
Device-side implementation
-
When the End Customer triggers the tunneling Command, it enters the Device's Command queue like any other Command. The next Send Telemetry API response sets
command: true(or, when MQTT is in use, the Command is delivered on the Command channel). -
The Device calls Get Command API to retrieve the tunneling details, which are encoded under the
tunnelkey:{ "id": "xxxxxxxx-xxxx-xxxx-xxxx-xxxxxxxxxxxx", "status": "pending", "name": "open_tunnel", "parameters": null, "tunnel": { "id": "unique-tunnel-id", "ip": "ip-for-ssh", "port": "port-for-ssh", "username": "username-for-ssh", "password": "password-for-ssh", "server_public_key_fingerprint": "SHA256:xxxxxxxxxxxxxxxxxxxxxxxxxxxxxxxxxxxxxxxxxxxx" } }Field Description tunnel.idUnique identifier for this tunnel session. tunnel.ipHostname or IP address of the Xyte proxy server. tunnel.portSSH port on the proxy server. tunnel.usernameSSH username for authenticating to the proxy. tunnel.passwordSSH password for authenticating to the proxy. tunnel.server_public_key_fingerprintSHA-256 fingerprint of the proxy server's ed25519SSH host key, inssh-keygenformat (SHA256:prefix + 43 base64url characters). The Device MUST verify this against the key the proxy presents during the SSH handshake before opening the reverse tunnel. Returnsnullonly if the proxy could not read its own host key — production firmware SHOULD treat this case as a hard error and abort. -
The Device verifies
tunnel.server_public_key_fingerprintagainst the host key the proxy presents during the SSH handshake. The Device aborts and reports the Command as failed if the fingerprints differ. -
After verification, the Device opens a reverse SSH tunnel from its local web server port to the proxy using the credentials from the Command response.
-
Once the tunnel is up, the Device confirms the Command via Update Command API with
"status": "done".
The tunnel closes automatically after 15 minutes of inactivity, or whenever the Device tears it down.
Demo session
To test tunneling manually from a Linux (or compatible) host, run the steps above using a tool like Postman or the embedded Dev Center.
Map the Get Command API response to these shell variables:
| Parameters Name | Value |
|---|---|
| {IP} | Command Response - tunnel.ip |
| {PORT} | Command Response - tunnel.port |
| {USER} | Command Response - tunnel.username |
| {PASSWORD} | Command Response - tunnel.password |
| {FINGERPRINT} | Command Response - tunnel.server_public_key_fingerprint |
| {LOCAL-PORT} | Port of the local web server on the Device |
| {LOCAL-HOST} | Host of the local web server on the Device (usually localhost) |
Run the following from a shell to simulate what the Device does:
# 1. Fetch the proxy's ed25519 host key and compute its SHA-256 fingerprint.
#    -t ed25519 is required: the API publishes the ed25519 fingerprint only,
#    and ssh-keyscan returns multiple key types by default.
SERVER_KEY=$(ssh-keyscan -t ed25519 -p {PORT} {IP} 2>/dev/null)
ACTUAL_FINGERPRINT=$(echo "$SERVER_KEY" | ssh-keygen -l -f - | awk '{print $2}')

# 2. Compare against the value from the Command response. A mismatch indicates
#    either a misconfigured proxy or an active man-in-the-middle — never bypass.
if [ "$ACTUAL_FINGERPRINT" != "{FINGERPRINT}" ]; then
  echo "Host key fingerprint mismatch — aborting." >&2
  exit 1
fi

# 3. Pin the verified key and open the reverse tunnel.
echo "$SERVER_KEY" >> ~/.ssh/known_hosts
ssh -o ServerAliveInterval=5 -o StrictHostKeyChecking=yes \
    -p {PORT} -N -R 8080:{LOCAL-HOST}:{LOCAL-PORT} {USER}@{IP}

# You will be prompted for {PASSWORD}.
Iftunnel.server_public_key_fingerprintisnull, the proxy failed to read its own host key. This is a server-side fault. Production firmware should treat it as a hard error and abort, not fall back toStrictHostKeyChecking=no. The fallback is acceptable only for one-off manual debugging.