In this guide, you wil be able to cloudify your first device to the Xyte cloud!
Before you start, please use this link to create your portal in order to run the steps below. This will guide you through the different stages of onboarding with a user-friendly wizard.
- Click on Models

- Click on Add Model

- Type in your model name

- Click on Save

- Click on your test model

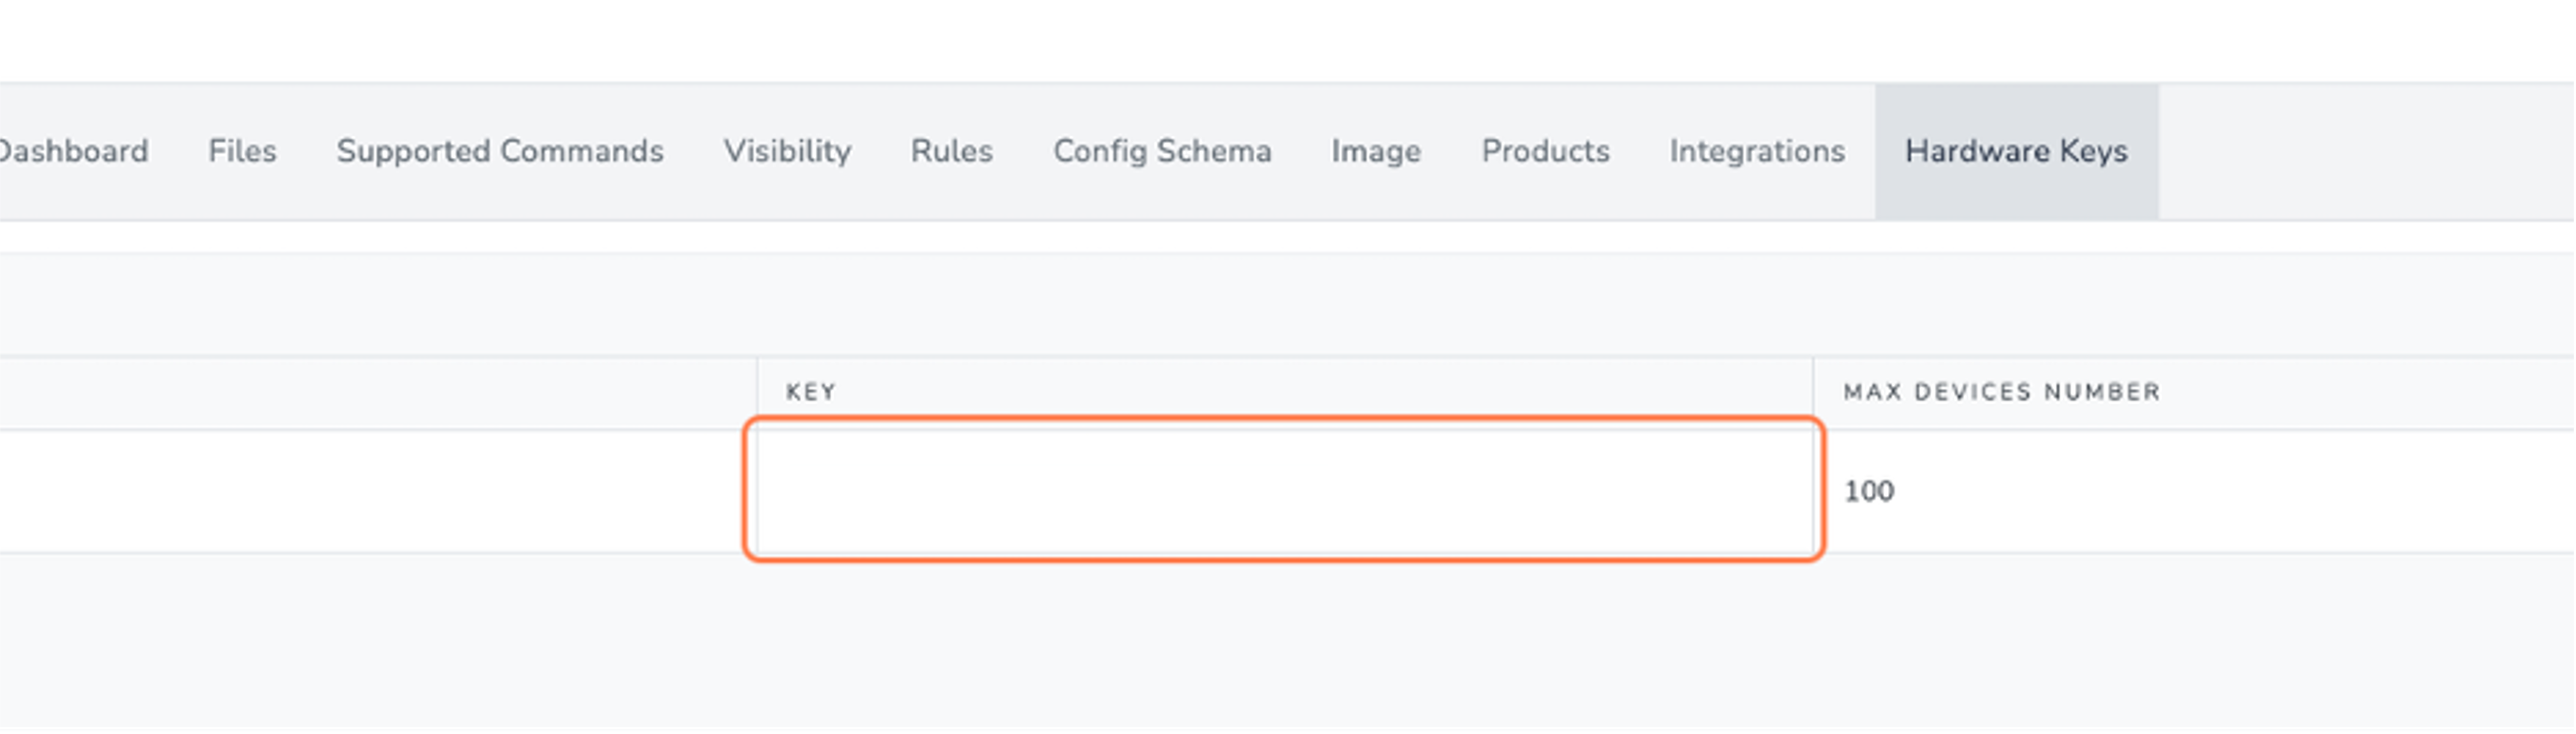
- Click on Hardware Keys

- Copy the Hardware key from the hardware key’s tab.
The hardware key is a unique key that Xyte platform is generating for each model, so once a device is registered using this model, Xyte will identify that this device was created from this specific model. By default- this hardware key is eligible for only 100 devices, but you can always create a new one with as many devices as you wish. The idea behind this, is to have the ability to change the hardware key in case it was “Hijacked”.
-
Go to your API testing tool.
If you are using Postman, feel free to use the Full API Export we created for you. You can find more information about it here. Next, you will be able to use either your API tool or your code to start integrating within the Xyte platform. -
Register your first device with this model!
First, create a GUID for the cloud_id. For more details- please use this link. Then, register your device using the GUID and the hardware key from step #7. Finally, use the https://entry.xyte.io/v1/devices call. For more information, click here.

- Copy the JSON response and save it for your next API calls.
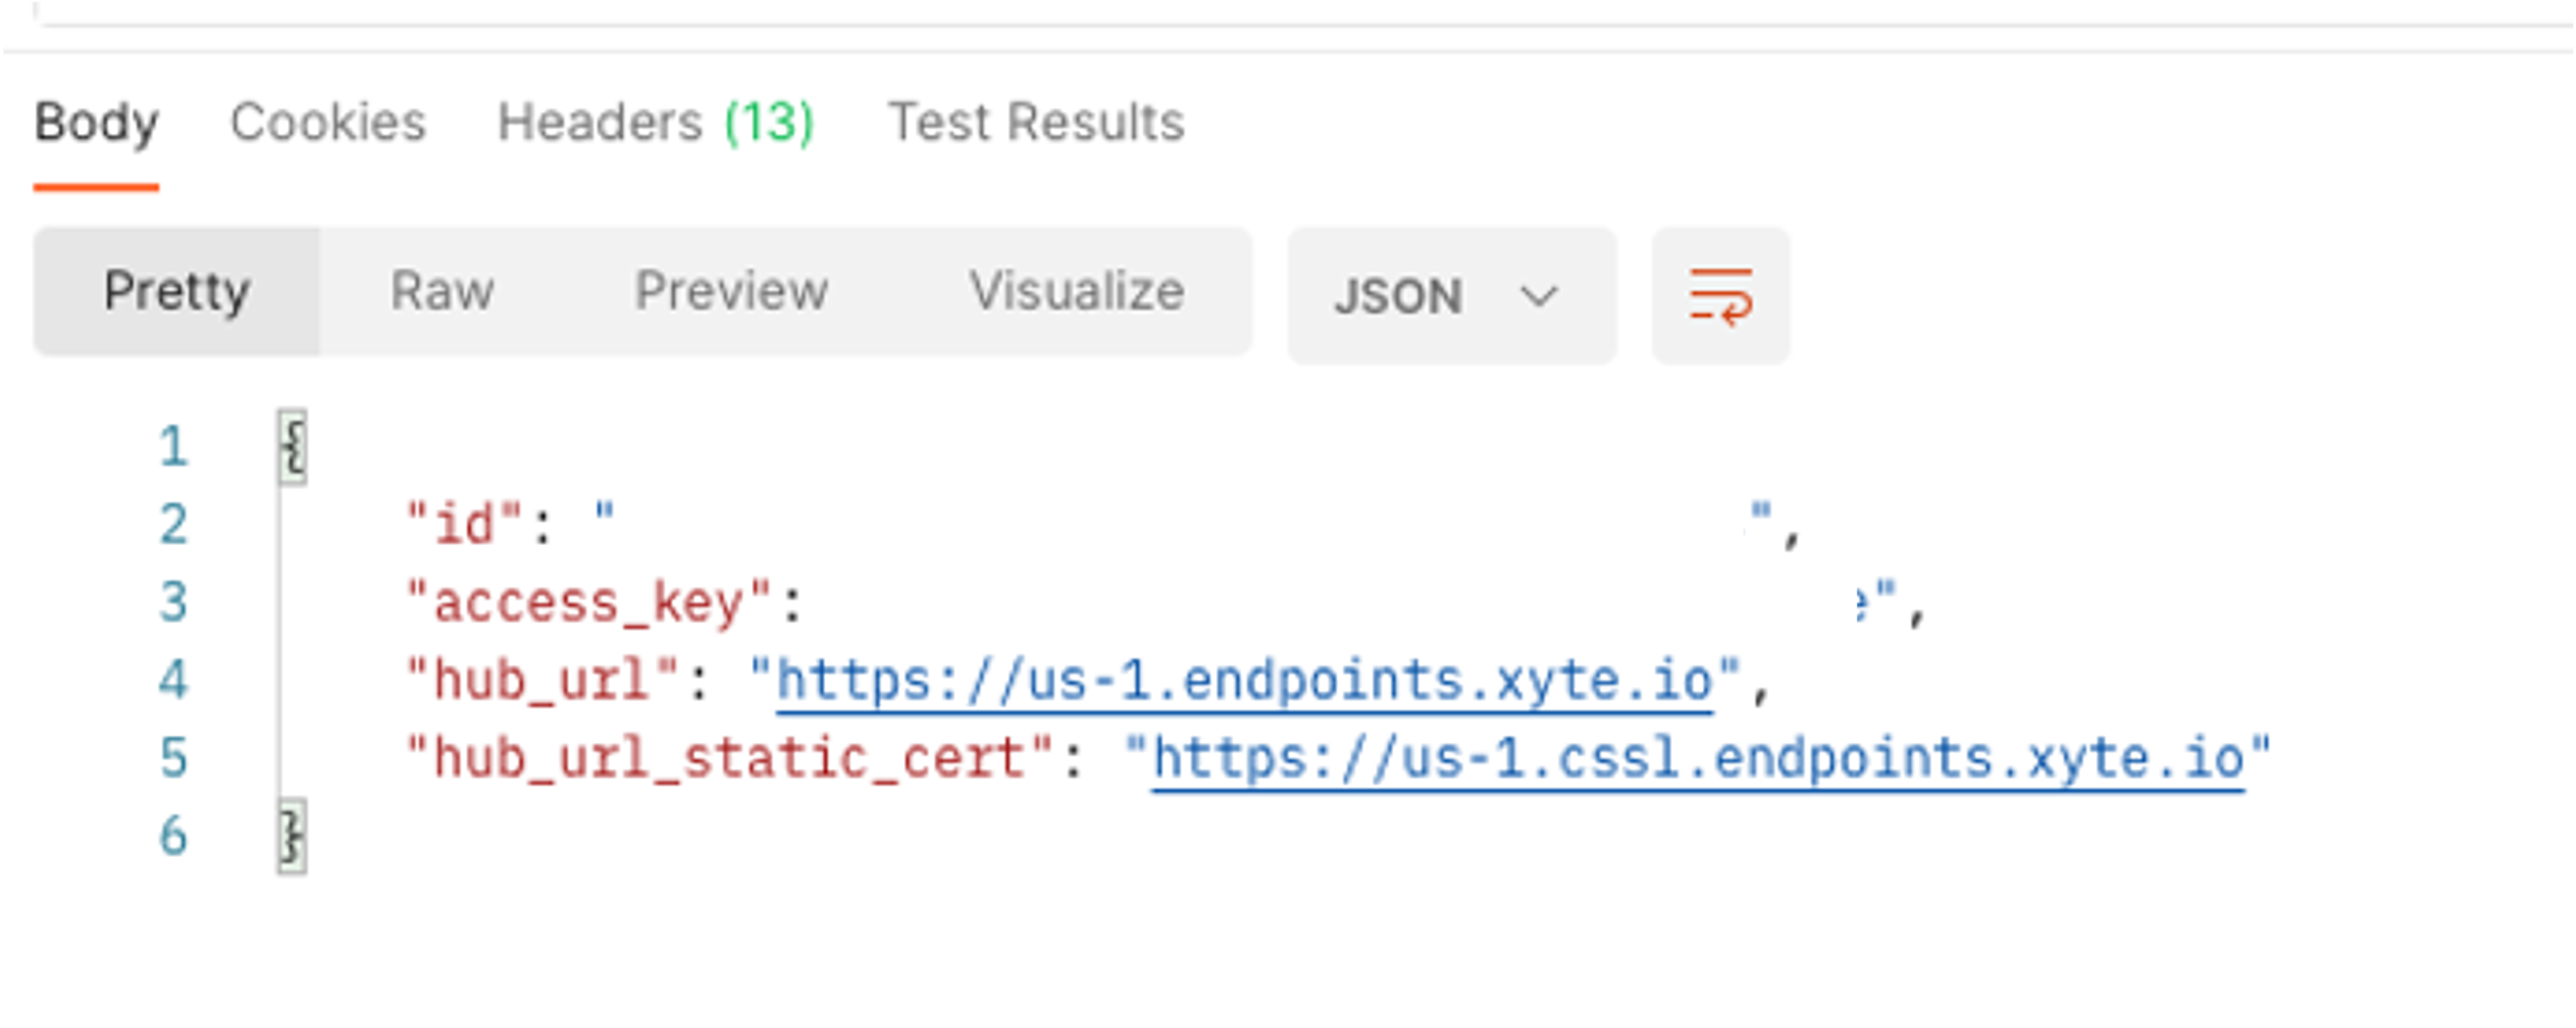
To get more information about each parameter, please use this guide.
Usually, you will need to save only the 3 first values, unless you are willing to use an SSL certificate URL.
- Go to the device tab
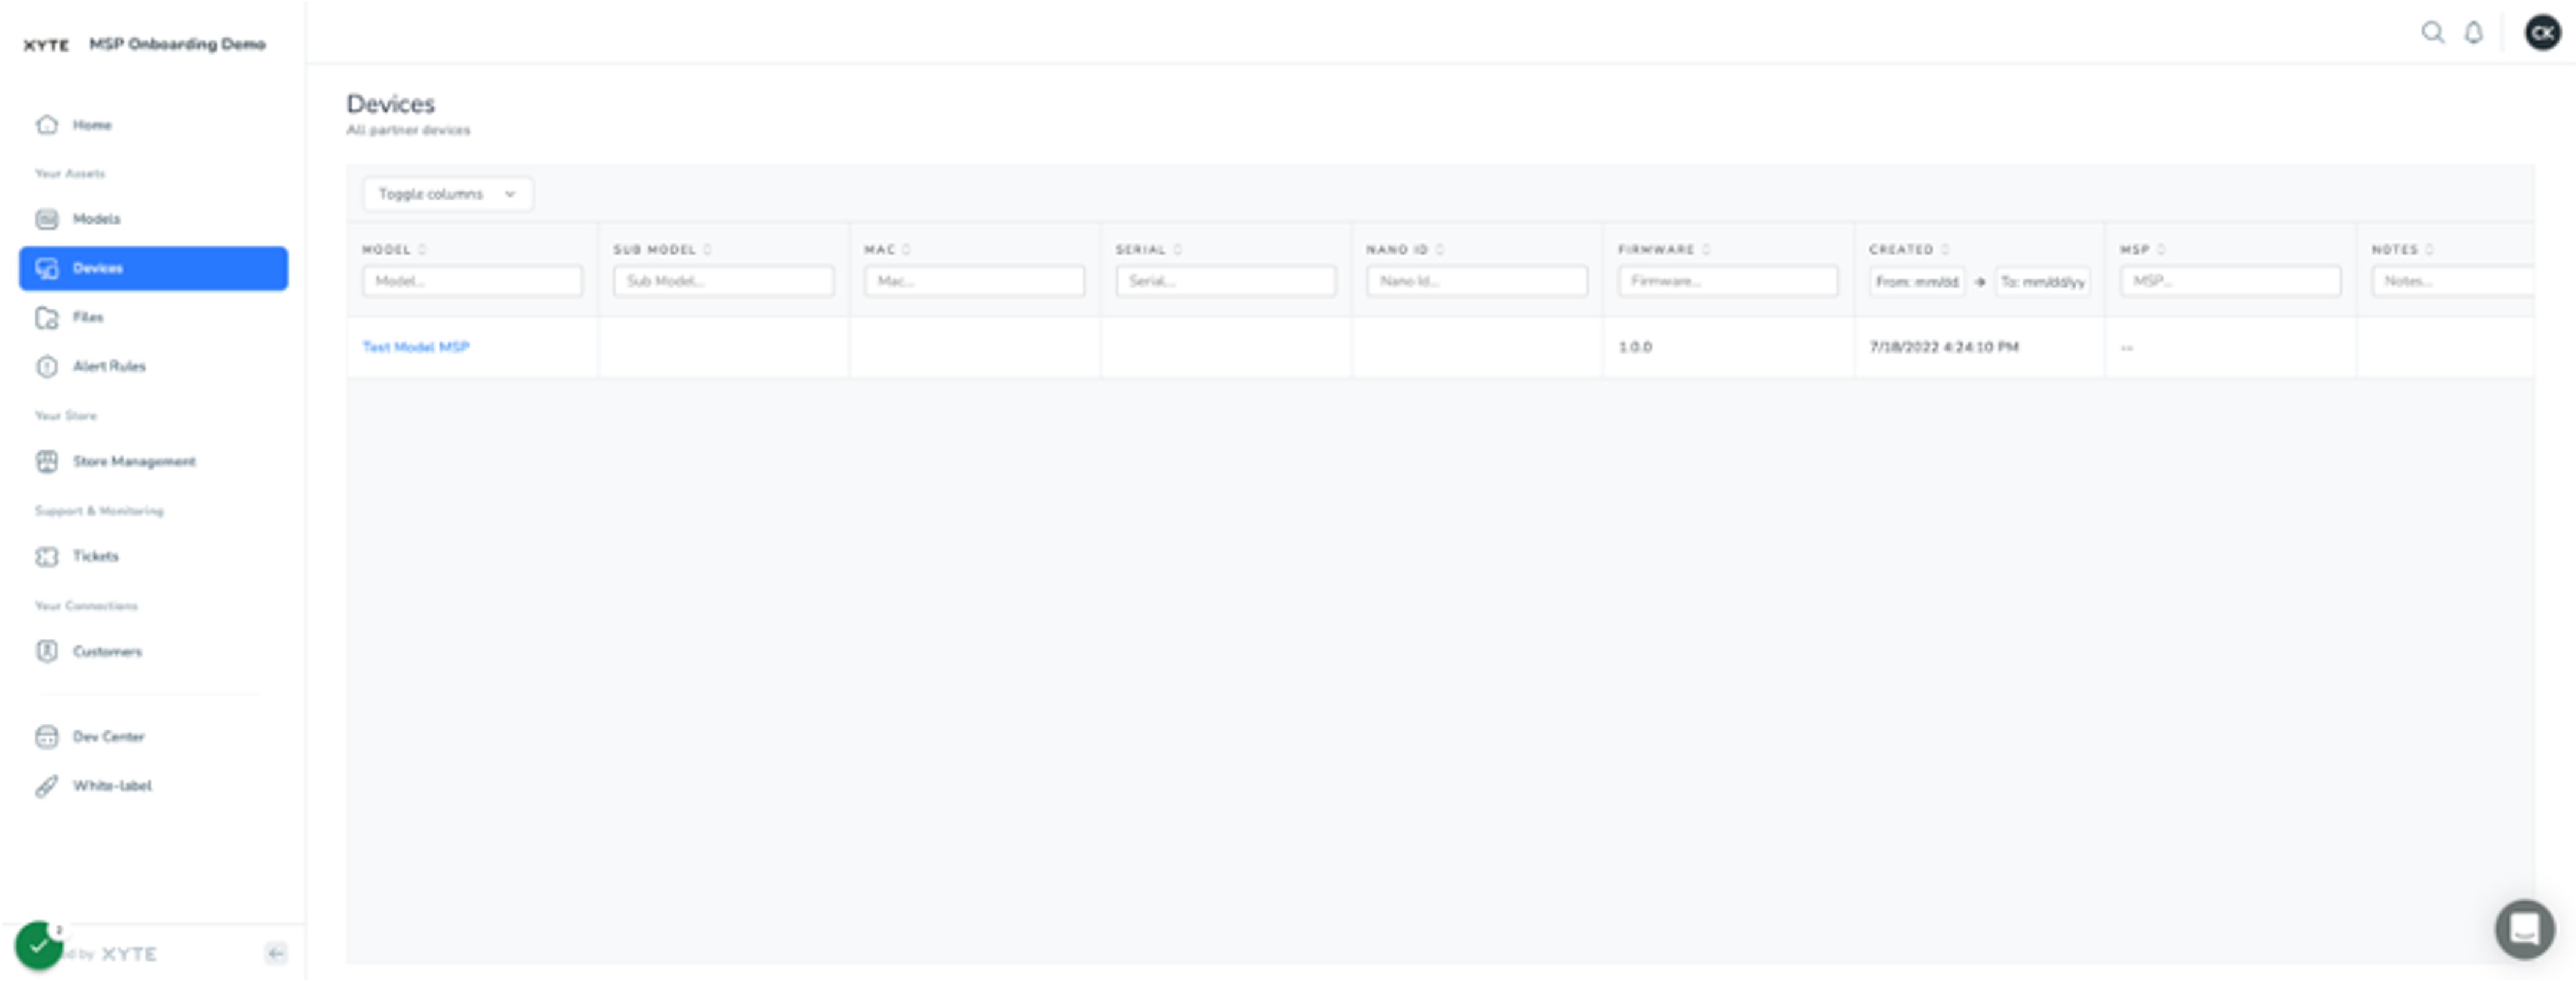
- Your first device is now registered!
13 . Start sending Telemetries
Call the {{hub_url}}/v1/devices/{{device_id}}/telemetry.
Use the values saved from step #10 and send your first telemetry!
Place your id on the {{device_id}} placeholder
Place your hub_url on the {{hub_url}} placeholder
Place your access_key under the Authorization value on the header.

For more information about the ‘Send Telemtry’ API, please click here.
- Now let’s claim your device on the end-user side, and see the telemetry
Click on Customers on your portal, and click ‘Visit Portal’. This will lead you to the customer portal of your lab account. The lab account is being created by default to enable you to run some tests before providing the model to your customer.

- You can also achieve the same result of redirecting to the customer portal by going to {{your partner name}}.on-xyte.com (e.g xvision.on-xyte.com). Type in your email and password and click on sign in.
Now you are in the customer portal!
This is what your end-users will see, and where they will claim their devices
- Add new area

- Add new space

- Click on Devices

- Add your first device

- Choose your model from the list

- Paste your cloud_id into the input box

- Click on Telemetries

- see your telemetry!

Now you have everything you need for the first 2 API calls in order to integrating with the Xyte platform.
Your customers can now claim a device, see incidents created from telemetry-based rules, see widgets, and more.
In order to implement the commands flow, config flow and more, please go through our API reference.
Please feel free to reach out with any questions at [email protected]